|
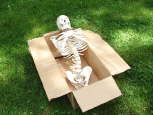
Step One: Prep That Bucky
Out of the box, your 4th-quality Bucky maybe be missing some parts and/or have damaged hardware, also some of the nuts may have worked loose and should be tightened before you begin.
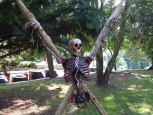
Hang your Bucky from a hook just about eye level outside somewhere with good ventilation. You may want to put down the tarp.
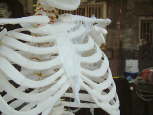
Step Two: The Bucky Has No Clothes
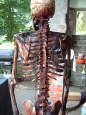
Cut some strips of the cheese cloth and separate it until you have a single thickness. Spray adhesive into joints and onto the ribcage liberally. Apply a piece of cloth onto the skeleton following surface details, start from the top and work the cloth through into spaces between ribs and clavicles. Add more cloth, keep it one sheet thickness and try not to fold it over too much. Stretch the cloth in some places and fray the edges for a more rotted look. Hide features like hardware with a single sheet, being careful not to impede the props movement.
Keep adding cloth until you are happy with the result, I didnt want to overdo mine so I did about 3 layers in a shirt pattern. Let dry overnight.
Step Three: The Rain of Stain
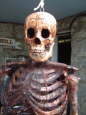
The adhesive may still be a bit damp, but no matter! Put down your tarp for this one, youre gonna need it. Starting from the top, use your foam brush to paint the stain onto the top of the skull. Work it into the cracks with your 1 brush, get good coverage of the skull as the stain will pool and congeal in low spots. Keep working the stain until satisfied. Tip: the foam brush works well to add details such as cracks, cuts and designs to your skull, I made a star pattern on the forehead for texture, it ran and now looks very spooky.
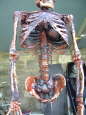
Now start on the clavicles (collar bone) with a fully soaked foam brush, touch the fabric with stain and keep dabbing into joints. Cover everything you can reach with the foam brush including inside the ribcage, shoulder blades (scapula) and spine. Work downward. Stain takes a long time to dry, you may want to jump around and rework important places. Dab it. By now, the stain is raining down onto the tarp, I sopped it up with the brush and used it again. After a while, the sun started to go down and I decided to have a beer and call it a night.
Step Four: Paint
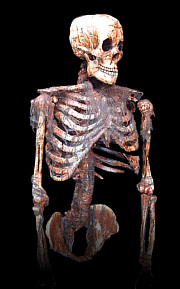
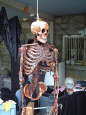
After a day or so, the stain will start to dry up, the pools have all turned into happy accidents The torso looks super rotten and Im worried that a neighbor might see it and call the cops. Now for some more detail. Using black enamel and a small paintbrush, I outlined the teeth. I used red spray primer to cover some areas missed by the stain, namely joints, spine, inside the ribcage. While the primer was still wet, I used flat black spray paint for shading while mixing in red primer for some unexpected results. Shade areas that are hidden, inside eyes, nose, mouth and joints. Tip: I used some Great Stuff spray foam to fabricate the sorry remnants of internal organs, just spray a few gobs onto the lawn, let dry, paint... viola!
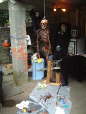
Step Five: Placement
Well, I sure am happy about the results. Now all I need to do is figure out where to display my latest masterpiece! I think we may use him as a ground breaker in the graveyard or as a forgotten prisoner in our torture chamber. One thing is clear: the kids are absolutely gonna hate this thing! Muhhhhaaahaa!
Happy Haunting!
-=k
|