|
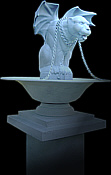
Thats right! Weve decided to go vertical with this latest prop and here are the plans:
Materials:
One 8 concrete form tube One wooden wine box 2 Rigid foam board One decorative bowl four L-brackets One ceramic gargoyle (we got Fergus for three whole dollars at a thrift store) Latex grey and spray black/green 3 paint brush
Tools:
a jigsaw foam sanding block a ruler a screwgun and 3 drywall screws Joint compound Construction adhesive and a caulk gun a measuring device/pencil
OK, heres what you do:
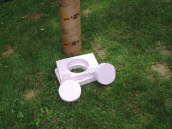
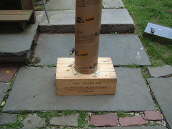
Step One: Prep your base
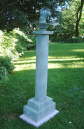
Cut 2 pieces of 2 Rigid foam slightly smaller than the top of your wooden box. Using your jigsaw, cut 2 8 round holes in the center of the foam. Glue the base pieces together with adhesive and then screw them together. Repeat on the 8 round pieces from the hole cuts. Trim the round plug so that it fits snugly into the tube, be sure to glue it in when you are satisfied with the fit. Use 3 screws to secure the L-brackets around the base of the tube.
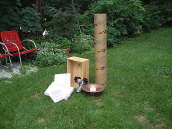
Step Two: Erecting the column
Find and mark the exact center of the top of your wooden box. Stand the tube up onto the box and drive screws throught the brackets. Glue around the seams and brackets for extra support. Apply some more glue to the bottom of the base foam, fit it over the tube and brakets. Once seated, use screws to fix the base.
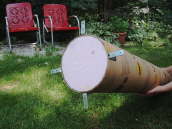
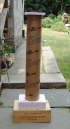
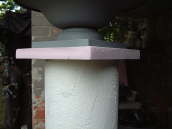
Step Three: The Capital
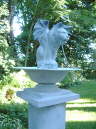
Cut a piece of foam about 11x11 square. Mark an 8 round circle into the center, gouge out a track about 1/4 inch deep into the foam (we used a dremel tool) this acts as a cap for the tube. Glue cap on. Using plenty of adhesive we affixed the bowl to the top of the tube.
Step Four: Making it look mean
Trowl drywall compound onto the base and column of your monument for that made of stone look. We tried adding some texture with a sea sponge while wet to great effect. Let dry overnight. Once dry, lightly sand the compound to remove any pointy spots that could break off.
Step Five: Painting
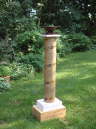
We used a light grey latex paint, it was $5 in the oops paint section of Home Depot. Starting from the top and working down, watch for drips and make sure to cover everything uniformly. Let dry then second coat it. Paint your Gargoyle to match. Once dry, use plenty of adhesive to fix it into the bowl. We added some chain to make it look like he was being held against his will.
Step Six: Texture and weathering
Once your base coat is dry, begin lightly spraying recessed areas with black enamel. Stay about a foot away and let the paint settle onto the work. Experiment using different colors. When you are done spraying, dab your 3 brush into the base coat paint, use a rag to remove most of the paint from the brush. Now, gently move the brush over the surface of the work in a gentle sweep downward, notice how the small bit of paint still in the brush only highlights the raised surfaces. This is called dry-brushing. Keep brushing lightly downward to simulate weathering by rain and wind. I will sometimes weather something 3-4 times in layers to get a good effect.
Well, thats pretty much it. This is a pretty easy prop to make, but at over 6 feet, Im sure it will get plenty of attention.
Happy Haunting!
-=k
|