choose a tutorial

the linkage

linkage, motor and support

dowl arms and hands

base and mechanism

right side view

The final prop!

I’ve really been wanting to do another animated prop, so after months of research and collecting of odds and ends, I put my plan into action...

The Grave Grabber: Motorized Action Prop

Parts:
9’ of 1” x 1/8” aluminium flat stock
36” wooden dowl
8 8/32” x 5/8” machine screws
24 #8 SAE washers (you could use nylon washers)
8 8/32” nuts with nylon threads
a low speed high torque motor (mine is from a paint mixer, it runs on 110v at 32 rpm)
1 spooky head (I used a Skillcraft model skull and a
“Gramps” Buckey Lid)
1 pair of spooky hands (coat hanger and spray foam)
Some of the assorted lumber every haunter has lying in the back of their garage

Tools:
screw gun
electric drill & 7/32” bit
a metal file
a hacksaw with metal-cutting blade
safety glasses (lets keep the gore on the prop)

Step one: Construct the base
I used an old pine board as the base. I screwed a piece of 2x4 to it as a support for the mechanism. I made a servo tray at the back to hold the motor.

Step two: The Mechanism

enlarge

This component, hereafter known as “The Mechanism” is pretty simple to make. Cut your flat 1” aluminum stock into 3’ pieces, this will make it easier to handle. Set aside one of the pieces for later. Cut the others at around 30” and file off any sharp edges, do the same to the edges of the remaining 6” pieces. Drill a hole into the ends of all four. Drill an additional hole in the center of your 30” pieces. Bolt the pieces together to form a rectangle. It is important that all joints can move freely, use some 3-in-one oil to keep the action clear. Cut a 9” piece of stock from your spare, drill it and screw it to the 2x4 support, this becomes the slide rail.

see him in action!

714 kb AVI

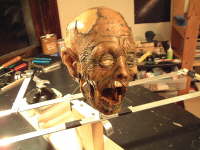
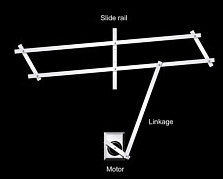
Step three: Motor and linkage
See figure 1. Mount the motor in its tray. Yes, I did use a bike wrench as part of my linkage,  but you can use some flat stock. The linkage is basically 2 pieces bolted together with one end fixed to the shaft. If you need to know more about motors and linkages, click here. Drill a hole about 3/4 of the length of the rear piece of the mechanism and bolt the linkage arm to it. You should have the motion you need to power the prop.

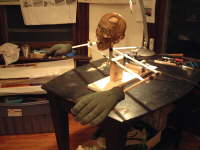
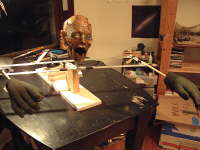
Step four: Getting your ghoul on
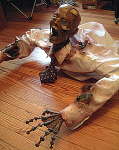
I used the remaining flat stock as the neck by bending it into shape and bolting it to the front bar of the mechanism, this makes the head move as well! I cut the dowl in half and duct taped it to the short pieces of the mechanism to act as the arms and keep the weight down. Throw an old shirt on him but be sure not to let it bind up the linkage. The hands are just work gloves filled with expanding foam and painted. They aren’t very realistic but they are lightweight.
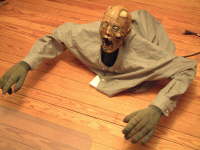
Step five: Enjoy!
Obviously there are still a few details that need to be addressed: tweaking, weathering, placement. I think we will put him by the path crawling from a grave rigged to a motion sensor. I am extremely happy with the way the head turned out. The guys over at ghostride.com are selling “Buckey Lids”, latex casts of gruesome faces that stretch over your bucky or Skillcraft skull and can be trimmed and painted for maximum effect. Highly recommended for the serious haunter!

-K


homepage...