|
or: How To Give That Floppy Skeleton Some Backbone!
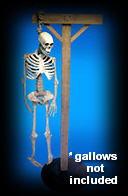
Ahh! The old droopy 5 rubber skeleton: In terms of price, sweet. Realism? ehhh... This inexpensive prop can be purchased for around $40-60 from many catalogs, but as you can see, it just doesnt look very scary and is almost impossible to pose. This article will deal with giving your CRSP (Chinese Rubber Skeleton Prop, or Crispy) a more natural and therefore more sinister appearance.
Parts you will need:
One Rubber Skeleton
6 1/2x3 wooden dowels
5 wire coat hangers
Tools:
a pair of needle-nose pliers
a small saw for cutting the dowels
a pair of scissors
Step One: Tear him limb-from-limb
The adhesive that is used on Crispy is easily torn. The joints may require a bit of force to separate them as some are more heavily glued than others. The wrists and elbow joints are not glued and will need to be carefully cut apart with scissors. After wrenching and cutting your unfortunate victim into his base components, you should have a lovely pile of bones with which to finish crafting your unholy minion.
Step Two: Add some rigidity
As you can see from fig. 0, some of the bones are unrealistically curved and the rubber has no rigidity. With the exception of some extra foam, the bones are hollow allowing you to slip them over your dowels. Place a length of dowel into each of the long bones and cut the it to length. For poseable hands and fingers, use 8-10 wire bent into a U shape and slip in one piece for the pinkie and thumb, one piece for the pointer and ring fingers. and one long piece for the middle finger. Pose any way you like (see fig. 2). Use a small piece of wire to shape the collapsed rib cage into a fuller, more realistic shape. The head is deflated and misshapen. I thought briefly about using the one pictured in fig. 1, but decided to make the best with the one provided.
Step Three: Reattachment surgery
By now, poor Crispy is ready to be pieced back together, cut up 2 or 3 wire coat hangers in half and slip them into the long bones just like with the dowels in step 2. Use the existing bend in the wire as the joints. Note: the wire has a tendency to slip out of the bone at this point, I used some 2 screws to fix everything together only after the final pose was chosen. A bit of spray foam on each joint will cover any unsightly cuts or hardware, plus it looks pretty cool!
Step Four: Striking a pose
Crispy is now posable, the bones are straight and the fingers can be bent into some very realistic positions. As any Yard Haunter knows, there are many different and terrifying ways to display your skeletons, I wanted mine to have motion without moving. Exploring different positions was great fun, some were comical, others menacing. After laying him out in varying poses for days on end (see figures 3-6), I decided to prepare for the next course of my demented vision...
|