|
Step One: Sketch
You may decide to sketch your idea out on on paper, this will help you to visualize the overall concept of your stone as well as any required materials.
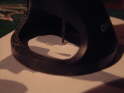
Step Two: Cut and shape the blank
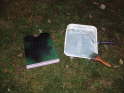
A blank is a tombstone shape with nothing on it. Use a hacksaw blade or foam cutter to make rough cuts and a sanding block to shape and smooth the edges of the foam to the desired form. See Figure 1.
Step Three: Lettering
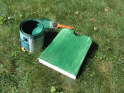
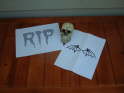
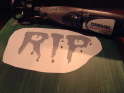
Paint your tombstone with a light coat of latex paint; this will prevent the adhesive from eating into the foam, Figure 2. Design and print the lettering on your computer. I also printed some bat wings to adorn this stone. See Figure 3.
Trim off most of the excess paper from your letters and apply a light but even coat of adhesive to the back of the sheet. Carefully apply the sheet where desired and working from the inside out, smooth any bubbles or imperfections, see figure 4.
Note: if youve never used a Dremel with router attachment, you may want to practice this next step on a piece of scrap foam.
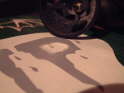
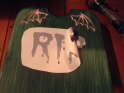
Set your router attachment to ¼ deep, dial it up to 7 or 8 and carefully trace the edges of the letters, the engraving bit will carve a thin channel into the foam. Starting with the closed letters such as o, p and a, trace the inside of the letter going in a counter-clockwise motion. See Figure 5. Then trace the letters along the outer edge in a clockwise motion (Figure 8), this will keep the bit from chewing up the foam and creating a ragged appearance to your engraving.
Once the letters have been traced with the Dremel, remove the paper carefully to avoid peeling off any foam, a small amount of water will also help to remove the adhesive. See figure 9. Finish removing the foam on the inside area of the letters with the bit (figure 10).
Step Four: Finishing and weathering
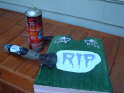
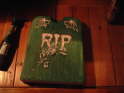
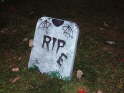
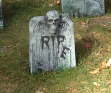
Create any cracks, scratches or worn spots on your stone and give these as well as the engraved letters a quick coat of latex paint, see figure 11. When dry, carefully roll a light coat of grey over the high spots to achieve a contrasting effect between light and dark. See figure 12. Paint and attach any ornamentation before weathering. See figure 13.
There are many different techniques to weathering, my favorite is to wet the stone with the spray bottle, apply a few short bursts of black spray, wait a few moments, then spray with water again. I repeat this last step several times with light coats until the desired effect is achieved.
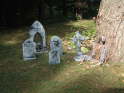
I guess that does it, place the new stone in your graveyard and enjoy! The foam material is a great medium for tombstone making; its cheap, light and easily carved. Experiment with some scraps to make larger and more ornate designs. Go on a cemetery hike and take pictures of some stones youd like to make. Your guests and family will enjoy these homemade originals for many years to come and youll find that your homemade stones get many more compliments then the store-bought variety just on originality.
|

 Building Tombstones from Pink Foam